|
Size: 4729
Comment:
|
← Revision 17 as of 2016-08-31 17:25:44 ⇥
Size: 4693
Comment: increased images to see control points easier
|
| Deletions are marked like this. | Additions are marked like this. |
| Line 24: | Line 24: |
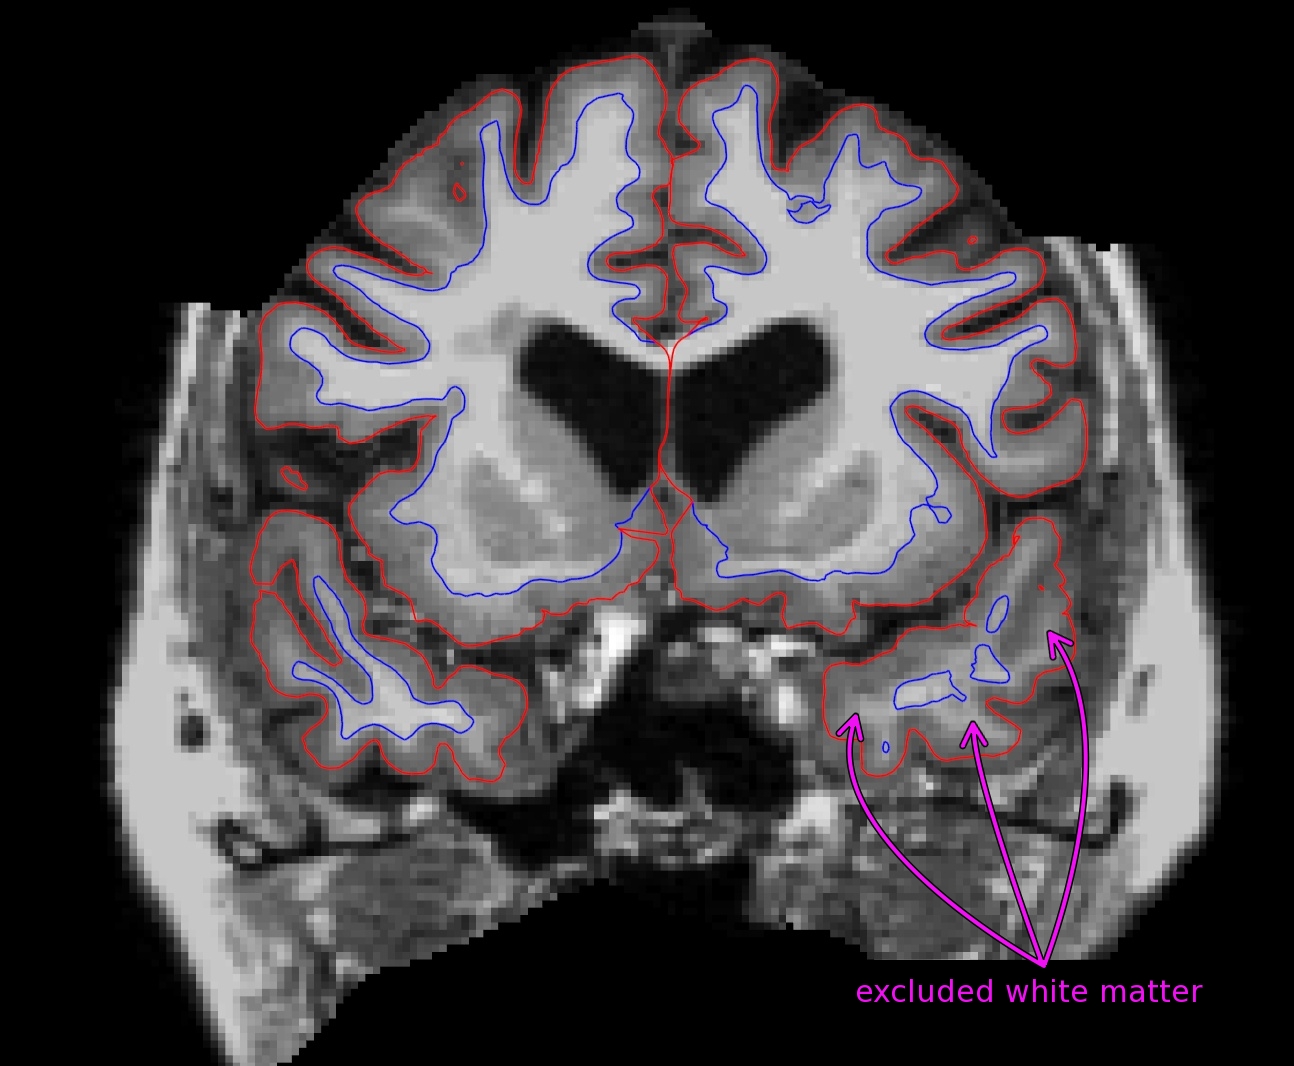
| Scroll through this subject and find the location where the white matter is being excluded from the surface. In subject cp_before, this happens around coronal slice 148.<<BR>> {{attachment:cp_before.jpg||height="304",width="375"}} <<BR>> To add control points you will first need to click on '''File -> New Point Set''', then enter '''control.dat''' as the name of the new point set, verify the '''control points''' option is selected and the template volume is '''brainmask''', then click OK. Left-mouse button clicking will create a control point; holding down the '''Shift''' button and a Left-mouse button click will delete a control point. As you select control points, they will appear as small green dots. Select a few control points around your trouble areas, space them out throughout the brain and on different slices. You want to pick points in a region where the wm intensity is lower than it should be (that is, having a voxel value less than 110). | Scroll through this subject and find the location where the white matter is being excluded from the surface. In subject cp_before, this happens around coronal slice 148.<<BR>> {{attachment:cp_before.jpg||height="608"}} <<BR>> To add control points you will first need to click on '''File -> New Point Set''', then enter '''control.dat''' as the name of the new point set, verify the '''control points''' option is selected and the template volume is '''brainmask''', then click OK. Left-mouse button clicking will create a control point; holding down the '''Shift''' button and a Left-mouse button click will delete a control point. As you select control points, they will appear as small green dots. Select a few control points around your trouble areas, space them out throughout the brain and on different slices. You want to pick points in a region where the wm intensity is lower than it should be (that is, having a voxel value less than 110). |
| Line 35: | Line 35: |
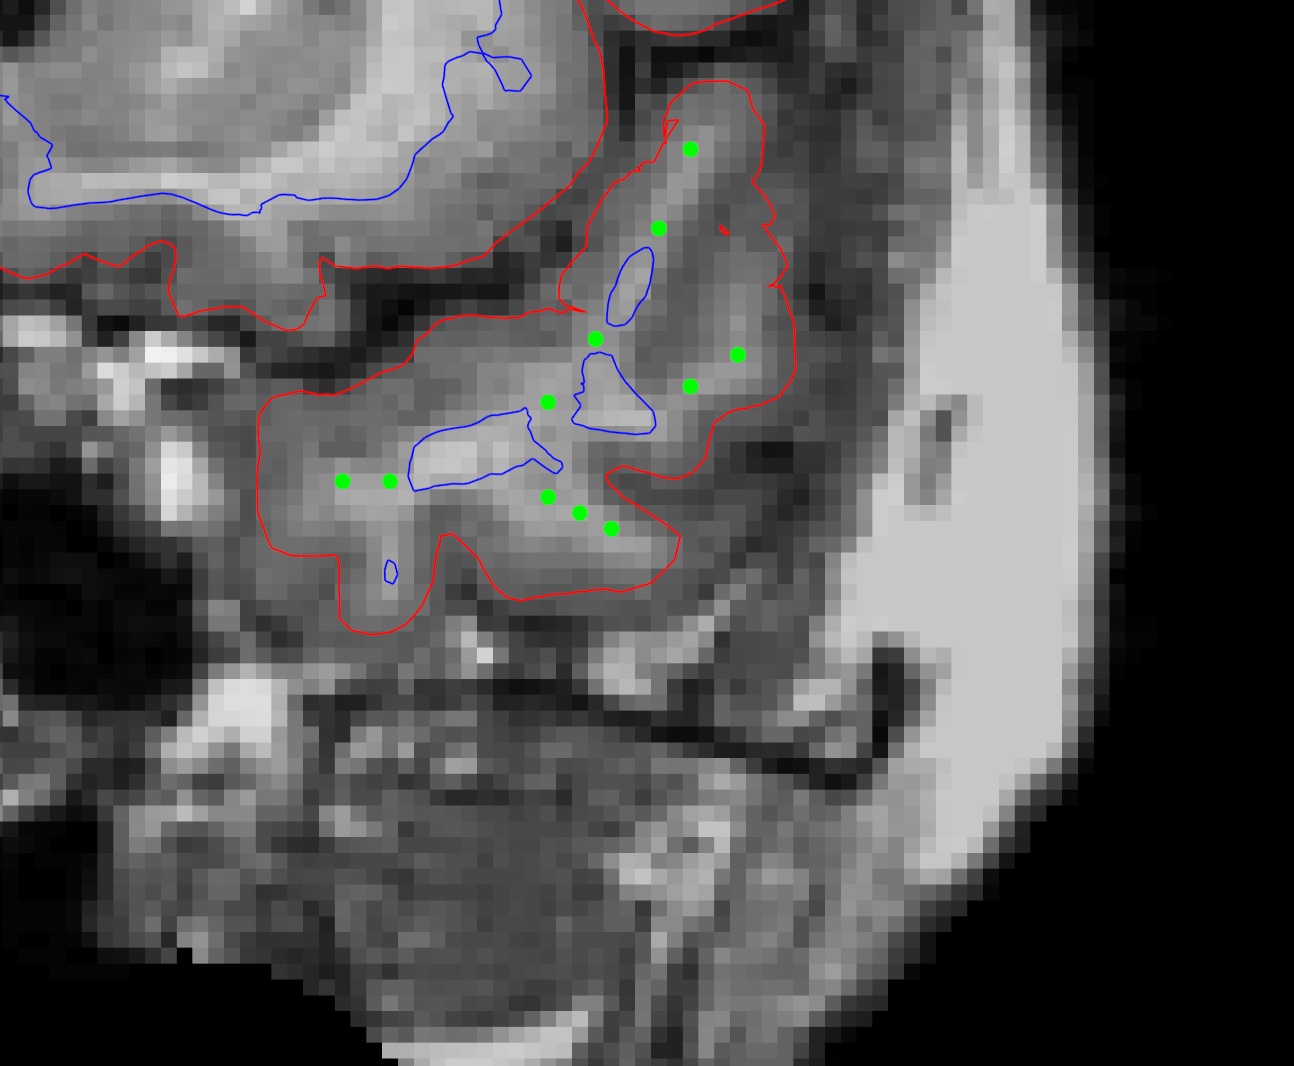
| Here is an example of one slice with the control points added. Note that there are other control points spread out through other slices as well.<<BR>> {{attachment:cp_before_with.jpg||height="304",width="375"}} <<BR>> After adding the control points, go to '''File -> Save Point Set''' or click on the '''Save point set''' button; enter '''control.dat''' as the file name to create a file called <subject name>/tmp/control.dat. Double check that the '''control points''' option is selected before saving. (If attending a course do not save the control points) Once your control points are saved you can rerun recon-all as follows: | Here is an example of one slice with the control points added. Note that there are other control points spread out through other slices as well.<<BR>> {{attachment:cp_before_with.jpg||height="608"}} <<BR>> After adding the control points, go to '''File -> Save Point Set''' or click on the '''Save point set''' button; enter '''control.dat''' as the file name to create a file called <subject name>/tmp/control.dat. Double check that the '''control points''' option is selected before saving. (If attending a course do not save the control points) Once your control points are saved you can rerun recon-all as follows: |
| Line 40: | Line 40: |
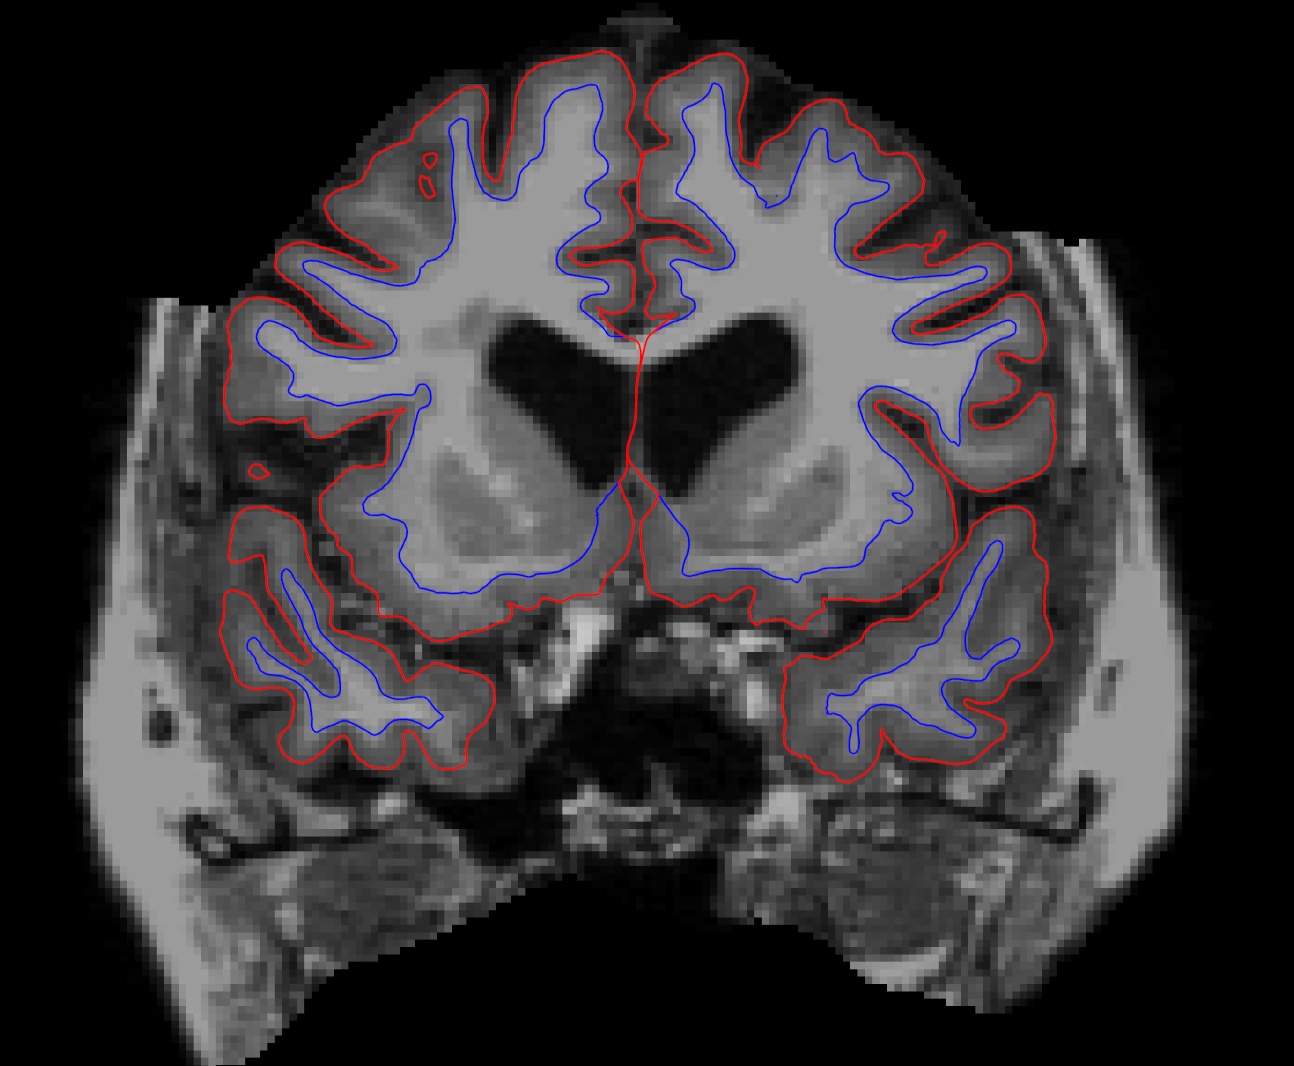
| '''Do not run this command if you are conducting the tutorial!''' This step will take a long time so there is no need to run it for the purposes of this tutorial. Using the added control points the subject should look like this after rerunning recon-all:<<BR>> {{attachment:cp_after.jpg||height="304",width="375"}} | '''Do not run this command if you are conducting the tutorial!''' This step will take a long time so there is no need to run it for the purposes of this tutorial. Using the added control points the subject should look like this after rerunning recon-all:<<BR>> {{attachment:cp_after.jpg||height="608"}} |
Using Control Points to Fix Intensity Normalization
To follow this exercise exactly be sure you've downloaded the tutorial data set before you begin. If you choose not to download the data set you can follow these instructions on your own data, but you will have to substitute your own specific paths and subject names.
Sometimes the intensity normalization step will fail because it cannot determine the proper intensity for white matter. The result is an erroneous white matter segmentation. A control point is a manually selected location in the volume that the user feels sure is inside the white matter boundary, and subsequently should be normalized to an intensity of 110. Freeview displays the intensity of any voxel your cursor is on as a "value" next to 'brainmask' and 'T1' in the Cursor and Mouse sections underneath the viewing window.
Manually Selecting Control Points
Subject cp_before is an example of a subject that needs some control points in order to ensure that the voxels are normalized correctly and then included in the wm.mgz volume. This page will walk you through setting control points to fix this type of problem. First, make sure you have cp_before loaded into freeview:
freeview -v cp_before/mri/brainmask.mgz \
-f cp_before/surf/lh.white:edgecolor=blue \
cp_before/surf/lh.pial:edgecolor=red \
cp_before/surf/rh.white:edgecolor=blue \
cp_before/surf/rh.pial:edgecolor=red
Note: If you are using your own subject data, where surfaces are not yet available (ie. the -autorecon2 stage has not run yet), then don't include the surfaces in the freeview command:
freeview -v <my_subj>/mri/brainmask.mgz <my_subj>/mri/T1.mgz
Scroll through this subject and find the location where the white matter is being excluded from the surface. In subject cp_before, this happens around coronal slice 148.

To add control points you will first need to click on File -> New Point Set, then enter control.dat as the name of the new point set, verify the control points option is selected and the template volume is brainmask, then click OK. Left-mouse button clicking will create a control point; holding down the Shift button and a Left-mouse button click will delete a control point. As you select control points, they will appear as small green dots. Select a few control points around your trouble areas, space them out throughout the brain and on different slices. You want to pick points in a region where the wm intensity is lower than it should be (that is, having a voxel value less than 110).
General tips for adding control points:
- Control points should only be added in regions that are definitely white matter (i.e., not in the cortex, cerebellum, brainstem, or outside of the skull).
- Control points should also only be added in regions where voxel intensity is not 110. A control point in a region that is already normalized to 110 will be useless.
Control points should NOT be used to try and normalize a brain lesion to 110. Such defects should be fixed with white matter edits.
- Control points can help recover thin wm strands that are dark by putting some at the base of the strand.
- Control points are also useful in areas of very bright intensity.
- Start off with a few control points spread out in your trouble area. You may need to add more. With experience you will be able to determine how many are appropriate, given your specific subject.
Here is an example of one slice with the control points added. Note that there are other control points spread out through other slices as well.

After adding the control points, go to File -> Save Point Set or click on the Save point set button; enter control.dat as the file name to create a file called <subject name>/tmp/control.dat. Double check that the control points option is selected before saving. (If attending a course do not save the control points) Once your control points are saved you can rerun recon-all as follows:
recon-all -autorecon2-cp -autorecon3 -subjid cp_before
Do not run this command if you are conducting the tutorial! This step will take a long time so there is no need to run it for the purposes of this tutorial. Using the added control points the subject should look like this after rerunning recon-all:

